


How to take pictures of your skin for your dermatologist
Taking high-quality pictures of your skin or nails can help your dermatologist:
Examine your concern during a telemedicine appointment.
See how a rash, growth on your skin, or other concern is changing.
Determine how well your treatment is working.
These five steps can help you take pictures that show your dermatologist what they need to see.
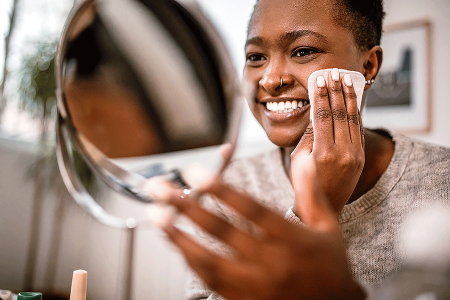
Remove any makeup or nail polish that you’ve applied to the area you want your dermatologist to examine. Sometimes, removing makeup or nail polish irritates the skin. If your skin looks irritated afterward, let the discoloration or other signs of irritation disappear before you take pictures.
When removing makeup, use a gentle makeup remover or cool water and a gentle cleanser
Hot water, soap, or fragrance may cause inflammation, which can hide the condition you want your dermatologist to examine.
Make sure that you have the following before you take your first picture:
- Good lighting: This lets your dermatologist see the exact color and texture of your skin or nails. Seeing both is essential for giving you an accurate diagnosis, noticing changes to your condition, and telling how well treatment is working.
To take pictures that show your dermatologist what’s happening with your skin, you need good lighting
An excellent source of good lighting is natural lighting that’s coming in through a window on a sunny day.
To get good lighting for your pictures, use:
- Natural, bright light, such as that coming in through a window. It works best.
- A light source like a desk lamp, book light, or flashlight when bright, natural lighting isn’t available.
- Light that shines on the area you want to photograph. The light shouldn’t come from behind you.
- Neutral, one-color background. This background usually makes it easier for the camera to take clear pictures. It also makes it easier for your dermatologist to see the area you’re concerned about. Make sure that you don’t see any people, animals, or objects in the background.
To shoot your pictures on a neutral background, do one of the following:- Stand in front of a solid-colored (one color throughout) wall or door.
- Place your arm, leg, hand, or foot on a solid-colored object like a tablecloth, towel, or bed sheet.
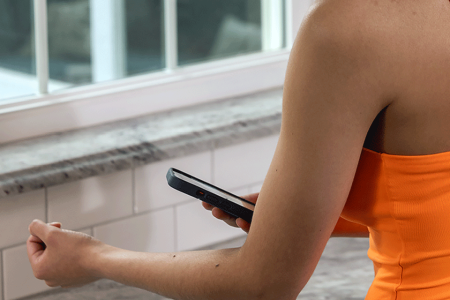
- Ability to take pictures of that area of your body. If you’re trying to photograph a hard-to-see area like your back or the bottom of your foot, consider asking your partner, a friend, or a relative to take the photos.
You can also use a selfie stick or the timer on your camera. When using the timer, make sure you have enough time to get in place before your camera takes the picture.
If you cannot see the area that you want your dermatologist to examine, ask someone close to you to take the pictures
You can also use a selfie stick.
- Good lighting: This lets your dermatologist see the exact color and texture of your skin or nails. Seeing both is essential for giving you an accurate diagnosis, noticing changes to your condition, and telling how well treatment is working.
Open your camera app and make sure that all your camera filters are turned off (disabled). Once your camera is set up, bring the skin (or nail) that you want to photograph into focus. Position the area you want your dermatologist to see in the center of the screen. When you see crisp detail and no blurring, you know the picture is in focus.
What you see on the screen should clearly show what you see without the camera.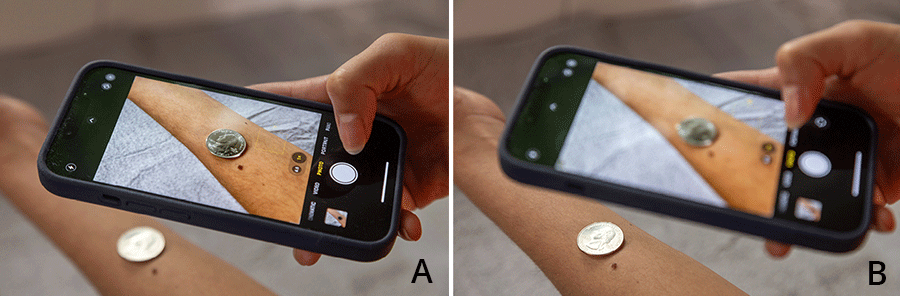
When taking pictures, check each photo to make sure it’s in focus (A). If a photo is out of focus (B), your dermatologist won’t be able to get the information needed. Take three photos of your concern. Each of the photos will show your dermatologist the area you’re concerned about from a different perspective. All three pictures should be taken using that neutral background and good lighting.
To make sure you have clear pictures to show your dermatologist, it’s best to take more than one picture for each of the following:- Orientation shot: This shot lets your dermatologist see where the concern appears on your body. For example, if you have a growing mole on your cheek, take a picture of your face to let your dermatologist see that the mole appears on your face.
- Comparison shot: This shot lets your dermatologist see both your concern and unaffected skin around that concern. For example, if you have a brown or black line under a fingernail, this shot should show both of your hands. In this picture, you should be able to see details like pores and body hairs.
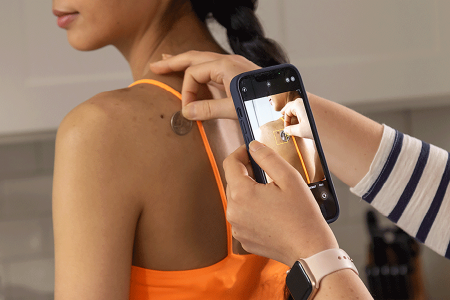
- Closeup shot: This shot should show the details that your dermatologist needs. When taking this shot, make sure it’s close enough to show details like fine lines on your skin.
When taking your closeup shot, it can be helpful to show your dermatologist the size of a spot or rash by placing a coin, pencil eraser, or ruler next to it. Make sure that the coin, pencil eraser, or ruler doesn’t cover up part of your spot or rash.
Check your photos. Only share photos with your dermatologist that have all the following qualities:
- In focus. Nothing is blurry.
- Free of shadows, glare, and harsh lighting. These can hide the details that your dermatologist needs to see. Taking pictures near a window where bright light is coming in and shines directly on the skin or nails is one of the best ways to eliminate shadows.
- Well-lit and clearly shows what you see. This includes seeing the same colors and textures in the photo that you see on your skin or nail.
Before sending pictures to your dermatologist, check each one
Only well-lit photos that clearly show what you see on your skin or nail will be helpful to your dermatologist.


How to send the photos that you’ve taken to your dermatologist
Contact your dermatologist’s office to find out how to send the photos. The photos that you’ve taken contain medical information that you want to keep secure. By contacting your dermatologist’s office, you’ll find out what method the office uses to protect this medical information.
How often should you take pictures of your skin?
Everyone’s skin is unique, so the same skin condition differs among patients. That’s why you need to ask your dermatologist how often to take pictures. Your dermatologist can provide you with a recommendation that is right for you.
Bottomline
Following these five steps when taking pictures of your skin or nails can help you get the photos your dermatologist needs. That’s important. Photos can play a key role in telemedicine visits, monitoring your progress, and tailoring treatment to your needs.
Images
Images 1, 6: Getty Images
Images 2 – 5: Property of the American Academy of Dermatology
Reference
International Skin Imaging Collaboration (ISIC)
Written by:
Paula Ludmann, MS
Ivy Lee, MD, FAAD
Reviewed by:
Kesha Buster, MD, FAAD
Hassan Galadari, MD, FAAD
Mona Gohara, MD, FAAD
Roopal Kundu, MD, FAAD
Ivy Lee, MD, FAAD
Sanna Ronkainen, MD, FAAD
Last updated: 7/20/23